To wall mount your soundbar without studs, start by selecting an appropriate location that aligns with your TV. Use a stud finder to confirm a secure fit, or consider using a Hangman Hanger for a straightforward installation. Accurately mark your bracket positions, ensuring they are level for optimal sound output. Secure the brackets using small nails to minimize wall damage, then hang the soundbar, ensuring it fits snugly. This method provides stability while enhancing your home theater aesthetics—there’s more useful information available on perfecting your soundbar setup.
Key Takeaways
- Use a Hangman Hanger, which allows for installation without needing wall studs and supports up to 50 pounds, making it ideal for soundbar mounting.
- Ensure the wall surface is smooth and clear of obstructions for optimal soundbar performance and mounting.
- Utilize the provided template to accurately position brackets for the soundbar installation, ensuring a secure fit.
- Measure and mark the ideal height for mounting the soundbar, typically aligning it with the TV for better audio quality and an immersive experience.
- Secure brackets using tiny nails to minimize wall damage while maintaining stability and alignment for your soundbar.
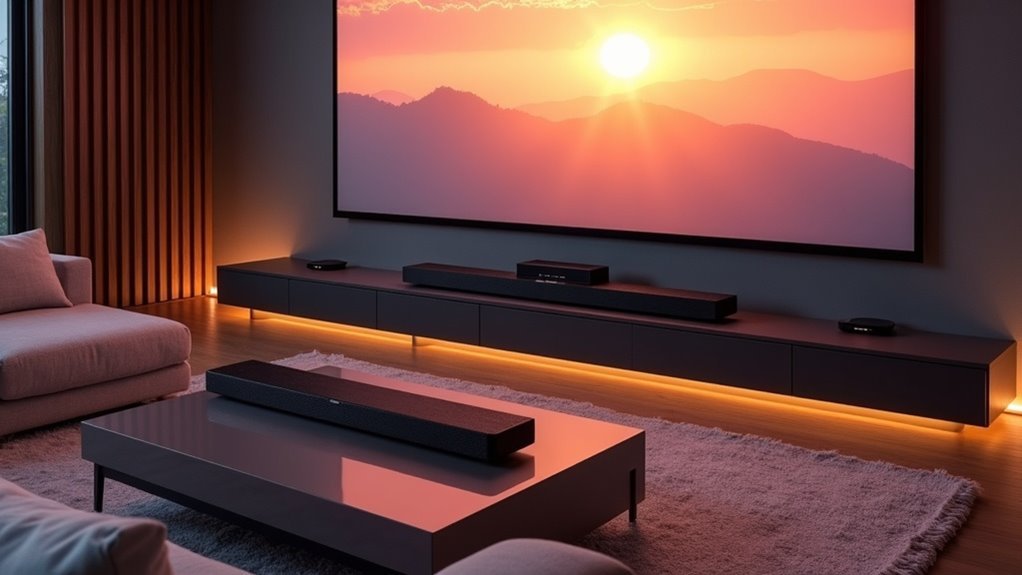
Choosing the Right Location for Your Soundbar
When you’re ready to mount your soundbar, selecting the right location is crucial for maximizing audio performance and enhancing your overall viewing experience. Aim to align the soundbar’s height with your TV to ensure optimal sound distribution.
Make sure the wall surface is suitable for installation, as the Hangman Sound Bar Hanger utilizes tiny nails that minimize damage while securely holding the soundbar in place. Maintain a distance from the TV to prevent any screen obstruction and to create a balanced aesthetic in your setup.
Use the built-in level feature to ensure the soundbar is mounted straight for the best acoustic results. Lastly, consider any nearby furniture or decor that might interfere with audio projection and functionality to achieve the best sound quality.
Marking and Measuring for Accurate Installation
To get started with marking and measuring for your soundbar installation, use the provided template from the Hangman Sound Bar Hanger to position the brackets accurately on your wall.
Measure the ideal height, typically aligning the soundbar with your TV, and mark this spot with a pencil.
Ensure that your marks are level to guarantee a straight and secure setup for your soundbar, enhancing your audio experience.
Determine Soundbar Position
Before you start hanging your soundbar, it’s essential to determine the best position for it on the wall. Aim to align the soundbar’s height with your TV for an ideal viewing and audio experience.
Use a stud finder to locate the nearest studs, but remember, the Hangman Sound Bar Hanger works without them. Mark the wall with a pencil where the brackets will go, ensuring they’re level and spaced according to your soundbar’s width.
Double-check your measurements before proceeding to guarantee a secure and even installation. Accurate positioning will enhance your listening experience and minimize wall damage.
Use Installation Template
Using the installation template provided with the Hangman Sound Bar Hanger can greatly simplify the process of marking and measuring for your soundbar’s placement.
This template guarantees precise alignment, helping you visualize where the soundbar will sit before you make any holes in your wall.
- Align brackets evenly for ideal stability.
- Mark tiny nail locations to minimize wall damage.
- Use the built-in level for accurate soundbar alignment.
Preparing the Wall for Mounting
Before you start mounting your soundbar, it’s essential to choose the right location and gather your tools.
Ensure that the wall surface is clean and free of dust to guarantee a secure attachment for your soundbar’s mounting hardware.
Additionally, checking for any hidden electrical wires or plumbing will help you avoid potential mishaps during installation, ensuring a smooth and safe setup for your audio experience.
Choosing the Right Location
When selecting the right location for your soundbar, it’s essential to consider both audio alignment and aesthetics. Aim to mount your soundbar directly below the television for the best sound projection and viewing experience.
Here are some key points to keep in mind:
- Ensure the wall surface is smooth and free of obstructions.
- Use a stud finder to locate hidden studs; if none are found, consider the Hangman Sound Bar Hanger for secure mounting.
- Position the soundbar at ear level when seated for optimal audio quality.
Accurate measurement and alignment will enhance both function and appearance in your soundbar setup.
Gathering Necessary Tools
To successfully mount your soundbar, gathering the right tools is essential for a smooth installation process. Here’s a quick checklist to ensure you’re well-prepared:
| Tool | Purpose |
|---|---|
| Hangman Sound Bar Hanger | Designed for easy installation without studs |
| Drill | To create holes for mounting |
| Level | Ensures your soundbar is straight |
| Measuring Tape | For accurate placement of the brackets |
| Pencil | To mark positions on the wall |
| Stud Finder | Confirms the area is free of studs |
Make sure to double-check your soundbar’s weight to ensure it’s within the hanger’s 50-pound capacity for safe mounting.
Preparing Wall Surface
Selecting the right spot for your soundbar is essential for ideal sound quality, and it’s best to aim for a location that’s at ear level when seated.
Before mounting, prepare the wall surface to guarantee stability and performance:
- Clean the area to remove dust and debris for better adhesive contact, ensuring optimal soundbar functionality.
- Use a stud finder to check for studs; knowing this will guide your mounting approach and help secure your soundbar effectively.
- Measure and mark the bracket locations using the provided template, double-checking their level for a polished look.
Taking these steps will set you up for a successful installation, providing an aesthetically pleasing and great-sounding soundbar setup.
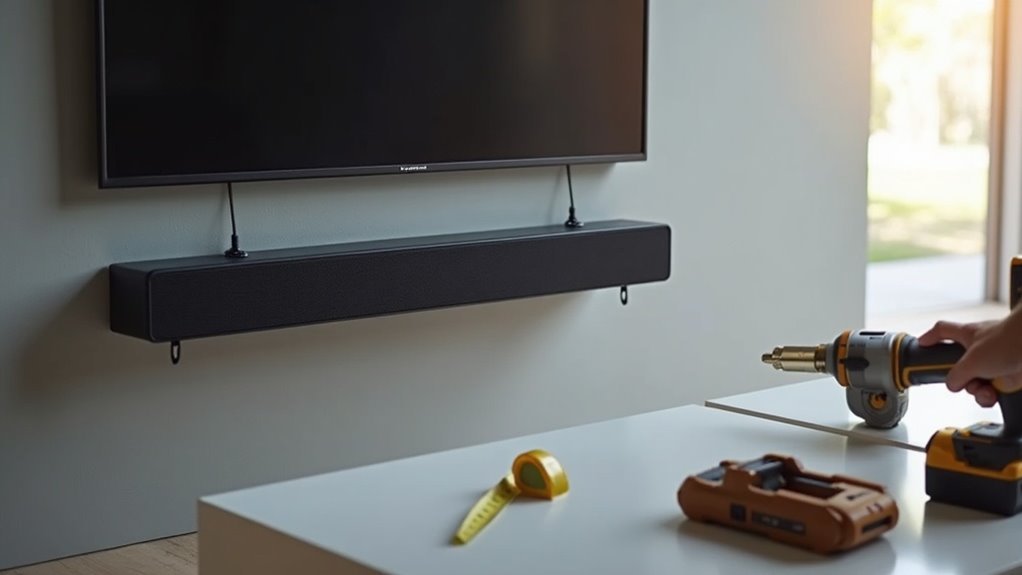
Installing the Mounting Bracket
Installing the mounting bracket is a crucial step in securely wall-mounting your soundbar. Start by using the provided template to mark the bracket’s position, ensuring that it aligns perfectly with your soundbar.
Adjust the distance between the two brackets based on your soundbar’s size for maximum stability. Next, secure the brackets to the wall using the tiny nails included in your kit—this minimizes damage while guaranteeing a strong hold.
Use the built-in level to confirm alignment, preventing any tilt that could affect your soundbar’s performance. Finally, double-check the stability by gently pulling on the brackets to verify they can support your soundbar’s weight of up to 50 pounds, ensuring an optimal audio experience.
Hanging the Soundbar Securely
Once you’ve secured the mounting brackets, hanging your soundbar is a straightforward task that ensures optimal audio performance.
Simply lift the soundbar and align it with the brackets for a snug fit. The Hangman Sound Bar Hanger can support up to 50 pounds, making it a dependable choice for a variety of soundbar sizes.
Lift your soundbar and align it with the brackets for a perfect fit; the Hangman Sound Bar Hanger supports up to 50 pounds.
- Use the built-in level for precise alignment.
- Adjust the distance between brackets to accommodate larger soundbars.
- Enjoy minimal wall damage thanks to the use of tiny nails.
Final Checks for Stability and Alignment
Before you settle in to enjoy your favorite show, take a moment to perform some final checks for stability and alignment of your soundbar. Use the built-in level on the Hangman Sound Bar Hanger to ensure it’s perfectly horizontal. Gently tug on the soundbar to confirm it’s securely attached, and inspect the wall for any signs of stress around the anchor points. Make sure the soundbar’s weight doesn’t exceed 50 pounds, and adjust the bracket distance if necessary for larger models.
| Check | Action Required |
|---|---|
| Level Alignment | Use built-in level |
| Secure Attachment | Tug gently on soundbar |
| Wall Surface Inspection | Look for stress or damage |
| Weight Capacity | Ensure it’s under 50 pounds |
| Bracket Adjustment | Modify for larger soundbars |