To use a soundbar with motorized TV mounts, begin by verifying the compatibility between your soundbar and TV. Position the soundbar at ear level, ideally around 42.5 inches from the ground, while ensuring a 4-inch clearance between the two for optimal sound projection. Secure the soundbar using the appropriate hardware, making sure it does not obstruct any sensors or ports on the TV. For a streamlined appearance, manage your cables effectively. This setup will enhance both convenience and audio quality, and you’ll find even more helpful tips on soundbars as you explore further.
Key Takeaways
- Ensure compatibility by checking the VESA pattern and weight limits of both the soundbar and motorized TV mount.
- Mount the soundbar at ear level, ideally 42.5 inches off the ground, without obstructing TV movement to enhance audio experience.
- Maintain at least 4 inches of clearance between the TV and soundbar to avoid interference with sensors and ports for optimal sound quality.
- Use appropriate hardware and cable management solutions to securely attach the soundbar and keep the installation neat and organized.
- Regularly inspect the alignment and connections of the soundbar to ensure optimal performance and prevent any sagging or misalignment issues.
Understanding Soundbar and TV Compatibility
When setting up a soundbar, ensuring compatibility with your TV is essential to avoid any issues.
Start by checking that both the soundbar and TV models can work together, especially if you’re using motorized TV mounts. Verify the VESA pattern on both devices for a proper fit.
Ensure your soundbar and TV are compatible, particularly with motorized mounts, by checking their VESA patterns for a proper fit.
Dimensions are important; make sure the soundbar won’t obstruct the TV’s movement, and confirm its weight aligns with the motorized mount‘s capacity.
Look for soundbars specifically designed for mounting, as they often include adjustable brackets that enhance compatibility, making installation seamless and optimizing performance.
Importance of Proper Mounting Height
Mounting your soundbar at the correct height is essential for an ideal listening experience.
Positioning the soundbar at ear level prevents obstruction issues while enhancing audio directionality, allowing for clearer sound.
Ensuring proper spacing between the soundbar and the TV also prevents functionality interference, maximizing your soundbar’s performance.
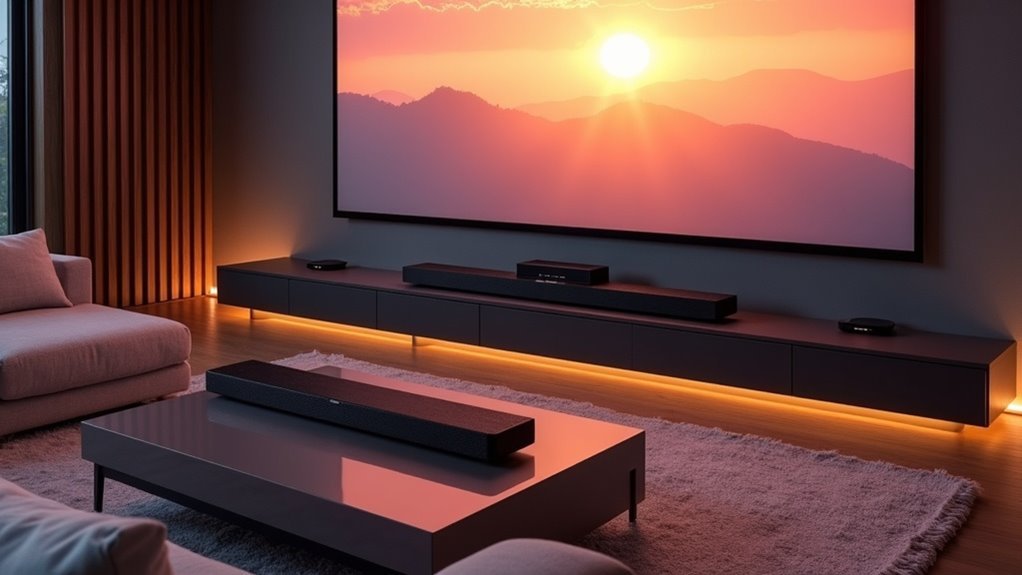
Optimal Ear Level Placement
To achieve an ideal audio experience with your soundbar, placing it at the correct height is essential. The optimal ear level placement aligns the soundbar around 42.5 inches off the ground, ensuring sound clarity and immersion. For a 65-inch TV, the bottom should be approximately 26 inches high, allowing you to mount your soundbar just below it with a minimum clearance of 4 inches. Here’s a quick reference for soundbar placement based on TV size:
| TV Size | Bottom Height (inches) | Soundbar Height (inches) |
|---|---|---|
| 55-inch | 24 | 42.5 |
| 65-inch | 26 | 42.5 |
| 75-inch | 28 | 42.5 |
Following these guidelines will help you maximize your soundbar’s performance and enhance your overall viewing experience.
Avoiding Obstruction Issues
Proper mounting height is crucial for preventing obstruction issues with your soundbar, particularly when utilizing a motorized TV mount.
Ensure that your soundbar is positioned at least 4 inches below the bottom of the TV to maintain functionality and ease of access. For optimal sound quality, aim for a height of approximately 42.5 inches from the ground, which aligns with the seated ear level.
This clearance helps to avoid sound distortion and ensures that both the soundbar and TV operate smoothly during height adjustments.
Additionally, secure the soundbar to the wall or TV mount using the appropriate mounting holes to prevent sagging or movement, thereby providing a stable audio experience even while the TV is in motion.
Enhancing Audio Directionality
When you position your soundbar at ear level, ideally around 42.5 inches off the ground, it significantly enhances audio directionality, allowing sound to reach your ears directly for an optimal listening experience.
Proper mounting height is critical for maximizing your audio enjoyment. Ensure there’s a minimum clearance of 4 inches between the bottom of your TV and the soundbar to prevent obstruction and improve sound projection.
Aligning the soundbar directly beneath the TV not only enhances dialogue clarity but also maximizes the benefits of advanced technologies like Dolby Atmos.
Installation Steps for Soundbar With Motorized TV Mount
Before you begin the installation process, it’s crucial to ensure that your soundbar is compatible with the motorized TV mount. This involves checking both the VESA pattern and the soundbar mounting brackets. Follow these steps for effective soundbar mounting:
| Step | Action | Notes |
|---|---|---|
| 1. Verify Compatibility | Check VESA pattern and brackets | Ensure proper fit |
| 2. Mount Placement | Use lower TV mounting holes | Align soundbar with the TV |
| 3. Secure Soundbar | Attach with appropriate hardware | Prevent sagging |
| 4. Manage Cables | Use in-wall wiring or channels | Maintain a tidy setup for Dolby Atmos |
Ensuring Clearance for Motorized Movements
To ensure optimal performance of your soundbar, it’s crucial to maintain sufficient clearance between it and the TV. Verify that there’s at least 4 inches of space beneath the TV to allow for unobstructed movement of the soundbar.
Ensure the soundbar is securely mounted, positioned at an ideal ear level when the TV is at its lowest. Additionally, check that the soundbar doesn’t obstruct any sensors or ports necessary for its functionality.
Lastly, consider extra space in front of the TV to prevent interference when the soundbar is in use.
Cable Management Solutions for a Clean Setup
Once you’ve confirmed that your soundbar has adequate clearance for motorized movements, it’s time to focus on cable management to keep your audio setup looking neat.
Ensure your soundbar has enough clearance for movement before tackling cable management for a tidy audio setup.
To achieve a clean aesthetic with your soundbar, consider these solutions:
- Install in-wall power units to completely hide electrical wires associated with the soundbar.
- Use cable ties to bundle and secure wires from the soundbar, preventing tangling and ensuring a tidy appearance.
- Explore wireless options for your soundbar to minimize visible cables and enhance the overall look of your entertainment area.
Tips for Optimal Sound Quality
To achieve peak sound quality with your soundbar, position it at ear level, ideally around 42.5 inches from the ground.
Ensure there’s a minimum clearance of 4 inches between the TV and soundbar to prevent any obstruction.
Additionally, pay attention to cable management to keep audio cables organized and out of the way, allowing for smooth operation and enhanced audio clarity.
Following these tips will optimize your soundbar’s performance for an immersive audio experience.
Positioning for Ear Level
Positioning the soundbar at ear level is essential for achieving the best audio clarity during your viewing experience. Ideally, you should mount the soundbar around 42.5 inches from the ground.
When using a motorized TV mount, ensure the soundbar is at least 4 inches below the TV for optimal functionality. Adjust the height as needed, utilizing up to 15 inches of vertical adjustment for ideal alignment.
- Securely attach the soundbar to prevent sagging.
- Test audio performance after installation.
- Verify cohesive audio-visual alignment for an enhanced experience.
Wall Mounting Considerations
While you may be enthusiastic to mount your soundbar, careful consideration of its placement is essential for achieving ideal sound quality.
Position your soundbar at ear level, ideally 42.5 inches from the ground, to ensure optimal clarity. Maintain at least 4 inches of clearance between the bottom of the Flat Panel TV and the soundbar to prevent obstruction of sound.
Utilize depth adjustments on the mounting plate for features like Dolby Atmos, as this can enhance sound dispersion for a more immersive experience.
It’s important to confirm compatibility between the Motion TV Wall Mount and your soundbar to ensure stability; you may need additional mounts for secure installation.
A properly mounted soundbar guarantees an immersive audio experience without interference.
Cable Management Solutions
Effective cable management is crucial for maximizing sound quality and maintaining a tidy aesthetic in your soundbar setup. To achieve this, consider the following tips:
- Use cable channels to hide wires along walls, minimizing interference with sound performance.
- Install in-wall power units to reduce clutter and enhance the visual appeal of your soundbar installation.
- Secure cables with ties or clips to prevent tangles and maintain clear pathways, ensuring optimal audio delivery.
Regularly check connections and alignment before finalizing your setup to avoid visible cables.
By implementing these strategies, you’ll not only enhance sound quality but also create a sleek look that complements your space.
Prioritize organization for the best audio experience with your soundbar.
Troubleshooting Common Installation Issues
When troubleshooting common installation issues with your soundbar, it’s essential to ensure proper alignment and secure mounting.
Confirm that the soundbar mounts to the wall without obstructing any components of your setup, such as motorized TV movements, and maintain at least 4 inches of clearance between the bottom of the TV and the soundbar.
Ensure the soundbar is wall-mounted without interfering with any setup components, keeping a minimum of 4 inches clearance from the TV.
Use compatible VESA mounts for stability and check the soundbar’s depth for proper alignment during motion.
Before operating the soundbar, verify all connections and cable management.
If leveling issues arise, tighten mounting screws and reassess the installation to prevent sagging or misalignment, especially if using drywall anchors.